How to Create Multiple Gmail Accounts Without Phone Verification 2023

by Sean B.

How to Create Multiple Gmail Accounts Without Phone Verification 2023 – A few years ago, Google introduced a free ad-supported email service called Gmail. This webmail service allows users to send and receive emails as well as chat with other Gmail users.

Due to the fact that an electronic mail system is one of the most used and popular means of communication nowadays, Gmail has had no problem snatching the popularity throne compared to other webmail services. Add to that the 10 GB of free storage that Google provides for their users allows them to store their attachments and mails online.


How to Create Multiple Gmail Accounts Without Phone Verification 2023

When it was first released, one could only sign in to just one Gmail account at a time. But everyone needs at least two separate accounts reserved for business and personal matters. Google seemed to have picked up hints from users, thankfully.

Now, you can access more than one account at once (in a single log-in session) with the multiple sign-in feature on Gmail. Learn how to create multiple gmail accounts and how to manage them here!


Creating More Accounts

Creating More Accounts


Just like creating your first Gmail account, the other accounts you’ll create are not any difference.

  • On the Gmail webpage, provided you are already signed in to your account, click on your profile photo. Choose the ‘sign out’ option to return to the log in page.
  • Choose the ‘Create an Account’ option and simply type in the required information.
  • Type in your new username and password that suit the nature of your Gmail account. If it’s meant to be a business account, choose a representative username that reflects your business.
  • Fill in all the requested information and finish by entering the captcha code.
  • Tick on the box verifying you’ll agree to the terms of service as well as privacy policy stipulated by Google
  • If you wish to add a photo, click on “Add profile photo” and choose your preferred picture from your computer before clicking on another “next step” button.
  • Now click on “Continue to Gmail” and you can access your new account.

There you have it folks! And if you want to create more accounts, simply sign out of your new account and repeat these steps on how to create multiple gmail accounts.


Adding more accounts on the Gmail App on Android


Adding more accounts on the Gmail App on Android

Here’s how you can add your other accounts to the Gmail app on Android devices. If you think it’s done from the Settings >> Account section, you’re wrong. The process is a nod to simplicity and ease of use.

These steps apply to Android devices.

  • Open up the Gmail app on your device
  • Click on the three white stripes button on the top left corner or simply swipe right with your finger from the left edge of the screen
  • When the sidebar is opened up, you have two choices here. Either you can scroll all the way down to the Settings section or click on the white arrow button next to your gmail address (located right under your profile picture).
  • Whichever way you decide to go with, you will see an “Add account” option
  • Choose between the “Google” or “Personal” (IMAP/POP) options depending on your preference
  • Fill in the required fields to add an account

It will take a few seconds for your device to sync your new account.


Adding more accounts on the Gmail app on iOS

Difference device does not mean there is a complete difference steps. Like what has been said, the process is real simple and easy.

  • Open up Gmail app on your iOS device
  • Click on the three white stripes symbol on the top left corner until a sidebar is opened up
  • While you can add an account from the settings section on the bottom of the sidebar on your Android, the iOS version will only show you all the accounts that you’ve been added to the app if you click on Settings. To add a new account, click on the white arrow button next to the email address situated right under the profile picture on the sidebar.
  • Click ‘Manage Accounts’ and choose ‘Add account’
  • Here you are given a few choices; Google, iCloud, Outlook, Hotmail, Office 365, Yahoo and other (IMAP), click on Google
  • When a prompt text box pops up asking permission, click ‘Continue’
  • Simply fill in the required account setup wizard


Using only one phone number?

When you create a Gmail account, Google requires you to input your phone number during the verification process. Gmail will send a verification code via text to the number we have inputted during the sign-up.

The code should be entered into the respective field before we can access our new account. Doing such thing is not a problem when creating new and single Gmail account. However, a problem arises when you need to create numerous accounts but only have one phone number.


If you are wondering if it’s possible to use only one phone number to create multiple Gmail accounts, the answer is absolutely yes. Not all people have more than two mobile numbers, or even more than one. There is a trick for those who are in a great need of creating several Gmail accounts while only having one phone number.

Here’s how to create multiple Gmail accounts without verification code through phone numbers. There are a few approaches to get it done actually. This first trick allows you to do this without using a phone number and on any web browsers, such as Mozilla Firefox and Google Chrome.

On Firefox

How to Create Multiple Gmail Accounts Without Phone Verification 2023: On Firefox

Go to the menu available at the top right corner of the screen

Then, choose ‘New Private Window’ mode

When a new page pops up on the screen, navigate to gmail.com

Then, simply create your new account by doing the usual sign-up process

On Chrome

How to Create Multiple Gmail Accounts Without Phone Verification 2023: On Chrome
  • When you use Google Chrome, choose ‘New Incognito Window’ more which is present at the top-right corner of your screen
  • Then, type in gmail.com on the new page
  • Create a new Gmail account by inputting the details

All the details (both on Firefox and Chrome) need to be entered such as first name, last name, username and password for Gmail as well as date of birth. However, you can simply skip the phone number column in the next field. Then, uncheck the box saying ’skip this verification’ and type in the captcha code. Lastly, click on the ‘next step’ button.

That’s all about it. At this stage, your Gmail will navigate you directly to the page where you can add a new profile photo.


The second trick includes using one phone number for multiple accounts.

To execute this method, you need to make use of your other Gmail account. Here’s what you need to do:

  • First thing first, you need to log in to your older Gmail account that you have created by using mobile verification.
  • After you have successfully logged in, go to ‘My Account’ section present at the top right corner of the page (this step is done through a web page not the Gmail app).
  • Click on ‘Your Personal info’ which is available under the Personal Info & Privacy section.
  • On the Personal Info tab, choose the ‘Phone’ option which comprises your registered phone number.
  • Simply click on the edit button and remove the registered number that’s linked to your Gmail account.
  • Then, all what’s left to get done is to hit the confirm button and hit the following remove button to finish the step on removing the number from your Gmail account.
When it’s done, you can use that phone number to create another Gmail account. If you wish to make numerous accounts, you can do this process again. Another perk of doing this is that you won’t even have to worry about getting your phone number blacklisted because Gmail does not care or even notice.

Then, if you want to switch between various Gmail accounts and open them side by side in the browser tabs, follow these ways:
  • Link the Gmail accounts (using the Add Account option)
  • Tap on the profile picture, current account’s email address or the name in the top right corner of your Gmail
  • Choose one of the email addresses appeared from the menu that pops up. All of the linked accounts is listed and you can easily toggle between them.


Gmail Dot

How to Create Multiple Gmail Accounts Without Phone Verification 2023: Gmail Dot

This is another trick to use various Gmail accounts while using one Gmail address
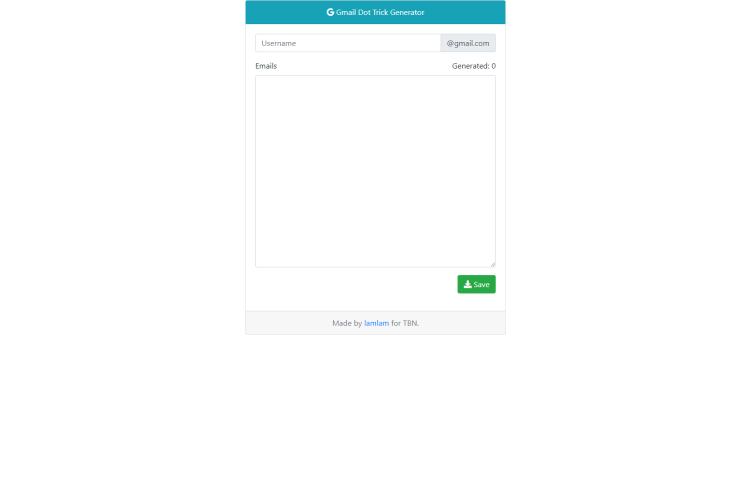
  • Choose a website where you want to sign up an unlimited number of times
  • You can sign up to any website unlimited number of times with one Gmail account. Note that, you must make sure that you already created a new Gmail account before using this trick.
  • This trick lets you use the same Gmail ID/address that you use on your other Gmail account. The key to this trick is by adding a dot in the address. For example, if your main or original account is howtocreate@gmail.com then, simply add a dot somewhere in between the name like create@gmail.com. As long as you add a dot after any character in the email address (anywhere before the @), you are golden!
  • You can add a dot after every character. This simple trick allows you to generate various accounts.
  • Moreover, you can even add ‘google’ after ‘gmail’ like howtocreate@gmail.com to howtocreate@googlegmail.com. @googlegmail and @gmail are pretty much the same and similar in every way so, the mail will be sent to the original email address.


Bluestacks

How to Create Multiple Gmail Accounts Without Phone Verification 2023: Bluestacks

This last trick on how to create multiple Gmail accounts without using a phone number is for those who happen to have Bluestakcs Andorid emulator

Download and install the Bluestack app on your laptop or Windows PC, then launch the software in order to open it.

Go to Settings menu and click on the button Google in order to create a new Google account.

Simply type in all the important details in the requested fields, such as first and last name, the email username, setting up recovery email and entering the captcha verification code.

Just like that, you have created another Gmail account successfully.

You can skip the recovery email part during the sign-up, but note that it will ask for a phone number verification in the next few days. Therefore, it’s preferable that you add a recovery email during the sign-up.


Import Email Accounts to your Gmail

Gmail makes importing mail from POP3 accounts really easy for it can be done simply by filling in the required POP server information and it’s done automatically. For example, if you wish to import email from your old Hotmail account then do these following steps:

  • Go to Google Mail and tap on the wheel icon located on the top right corner
  • Choose Settings available from the drop down menu then select ‘Accounts an Import’ tab
  • When the header that says ‘Check mail using POP3’ pops up, click on the ‘Add a POP3 mail account you own’ option
  • Simply fill in the email address and tap on the ‘next step’
  • You will be required to enter your password in the next window, check the boxes that apply and simply select ‘Add Account’

Kindly note that should you wish to treat the imported account like a separate email account, then it’s advisable that you check the option that says ‘Label Incoming Messages’. Then, make a label for the respective account. Moreover, it’s also highly recommended to ‘Archive incoming messages’ (ignore the inbox).

Once this process is done, Gmail will ask you if you wish to use the email as an alias to send email through that account. In this case, you will need to confirm this with a code delivered to the respective email address. This step is not mandatory and you can skip it and add the alias later. To do this, you can go to the ‘Send Mail As’ header found in Settings >> Accounts and Import.


Those are all the different methods on how to create multiple Gmail accounts with or without a phone number. With all this new knowledge, you can definitely enhance your Gmail experience and switch between your personal, business and even online shopping accounts like a breeze!

About Sean B.

Sean Bradley is a highly regarded marketing expert with extensive experience and expertise in the field. With a passion for helping businesses thrive and grow, Sean has established himself as a leading figure in the marketing industry. Sean's expertise spans various marketing channels, including digital marketing, social media marketing, search engine optimization (SEO), content marketing, and branding. He is well-versed in utilizing data-driven insights to craft targeted marketing strategies that resonate with audiences and generate measurable ROI.

Leave a Reply

Let's try FREE Giveaways. Or go to Free Gifts page

Update AdBlock to see the secrets. Hit a button below for update